Client Resource Series: Preparing for your session –
So, you’ve found your photographer and you’ve booked your session – what do you do next? Here are some helpful tips to make the most of your photography experience.
I get a lot of people in front of my lens and I’ll be the first one to tell you that what you wear really, really can make or break your photos. The right wardrobe choices can make the difference between a so-so image that will wind up tucked away in your family album and one that you’ll have made into a gallery wrapped canvas to hang in your living room. But choosing what to wear for your photos can be overwhelming -there are so many choices. And when you are putting together the wardrobe for family photos the task can be even more daunting. Let’s start with some basics.
What NOT to wear:
1.) Athletic Shoes – Your feet WILL be in your pictures and athletic shoes can really take away from the image. Wearing athletic shoes is a common faux pas by men. I get it; dudes don’t collect nice shoes like many women do, but a casual loafer or dress shoe really polishes your outfit.
2.) Ball Caps – Don’t wear them, PLEASE. Aside from the brim causing a shadowed face they are distracting and instantly reduce your images to an uber casual level. If you are a man and are wearing a ball cap to your photo session because you are balding – don’t. I’m married to a bald man and I think he and his chrome dome are downright hot. Chances are if you are a balding man wearing a ball cap to a photo shoot, your wife or girlfriend is the one that booked the session. If that’s the case, your lady thinks you’re handsome even without the hat on. Embrace it. Own it. Make a statement that would make Patrick Stewart proud.
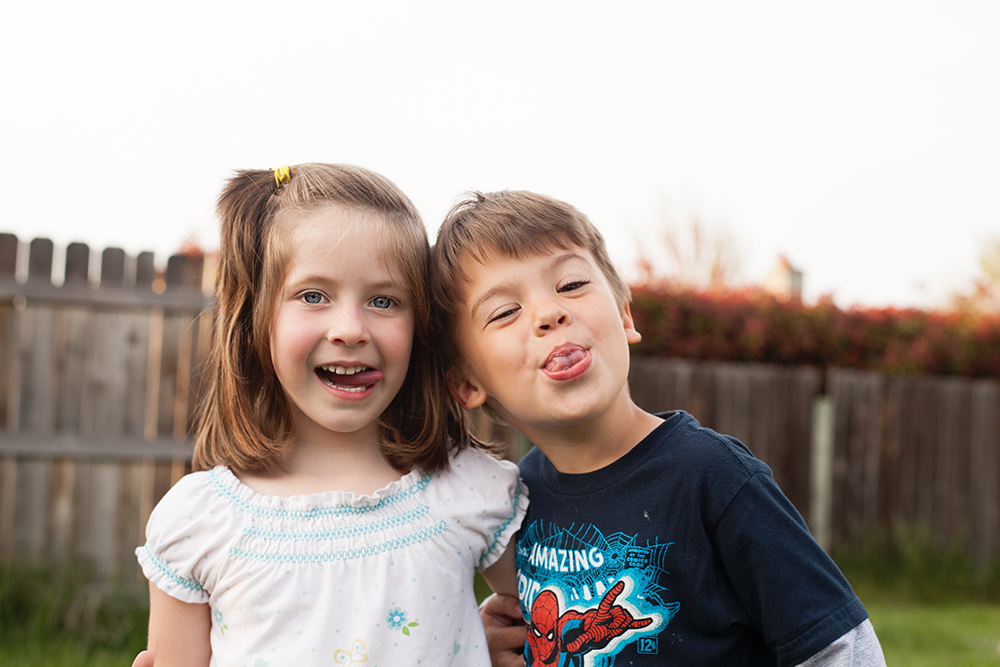
3.) Graphic Tees – With the exception of a session for a single individual (think a Daft Punk tee with an edgy fitted blazer) graphic tees are a major distraction in formal photographs. These seem to most communally pop up with my child clients. Having two young boys myself, I know how limited the selection is of childrens’ shirts that do not have some kind of graphic design on them – and I know the kinds of fits the kids can pitch when faced with leaving Darth Vader in the dresser drawer in favor of a ‘boring’ solid colored shirt or (God forbid) the dreaded button up. But seriously though, don’t wear graphics as the eye is immediately drawn to them in a photograph. Here’s a snap shot of my oldest and his best pal – what’s the first thing your eye is drawn to? Yup! Flippin’ Spiderman!
Now -if you can excuse the super-quick and sloppy photoshopping – here is the shot minus Spidey
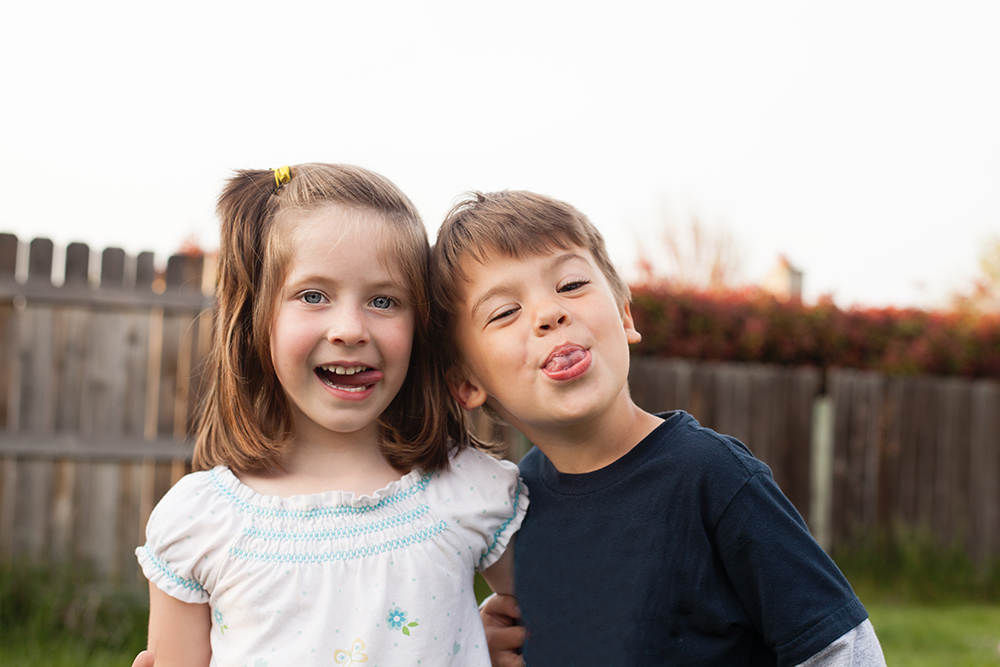
See how instantly the subjects’ faces become the focus?
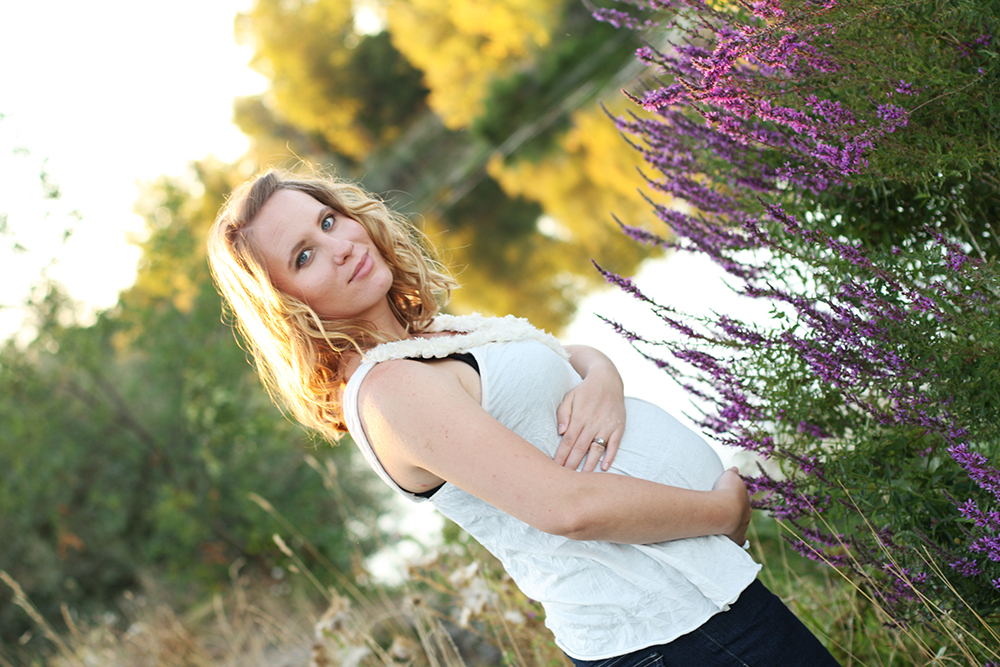
4.) Wrinkled clothing – Take the time to press your clothing before your shoot. Wrinkled clothes – even moderately wrinkled clothing – detracts SO much from your photos! Here is a SOOC (straight out of camera) example – this gorgeous client of mine looks absolutely stunning in her maternity photo but a crisp wrinkle-free top could have brought the image to the next level….
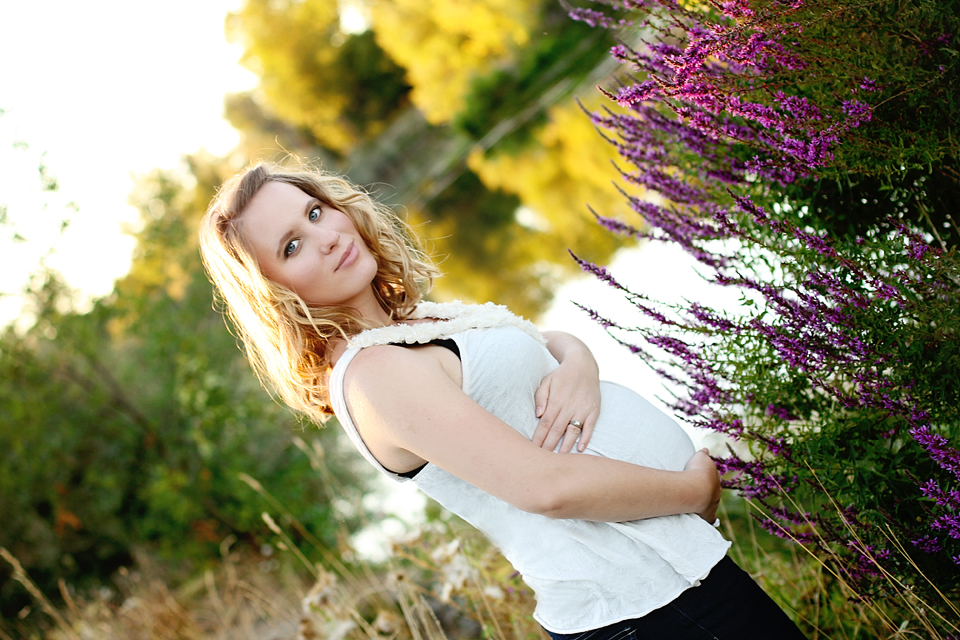
And here is the edited version where I have smoothed out some, but not all, of the wrinkles in Photoshop. That kind of digital ironing takes time and it is not really cost effective for me to spend hours just smoothing wrinkles from clothing for an entire session worth of images.
If the need be, hang your clothing in your car en route to your shoot and change after you arrive – this can keep easily wrinkled fabrics from disarray.
5.) Sunglasses – No, I have never had a client actually want to wear their sunglasses IN their photos (with a few exceptions for fun shots) but wearing your sunglasses before your shoot can leave red marks and indentations on the bridge of your nose. The same for wearing hats just prior to your shoot – they can leave marks and banding on your forehead. Let’s avoid both.
Okay. Those 5 are my biggest repeat offenders. Steer clear of them and you are well on your way to beautiful images!
********
PART II
WHAT TO WEAR
A single individual has the advantage when choosing their wardrobe in that they don’t have to worry about tying multiple outfits together in a complimentary way. When the session is for two or more people making wardrobe selections can get kind of tricky. So, here are some tips to help make your task a little more easy!
1.) Avoid the “uniform look”. Back in the 90’s it was vogue to dress everyone alike for family portraits. Well, it’s not the 90’s anymore and cloning everyone’s outfit is no longer cute. I highly recommend steering clear of matching ensembles. When you have everyone wearing the same color shirt it is sometimes hard to tell where one person ends and another begins. It also has the tendency to render the image less interesting. Letting everyone have their own unique outfit allows each person to stand out as an individual. Coordinate the colorscapes of the outfits and you preserve the individuality of each subject while tying them together as a group in an aesthetically pleasing way. That is not to say that this rule can’t be broken. There are a few instances where I have had clients show up all wearing similar clothing and it worked. Here’s an example of a super cute family all in jeans and white shirts.
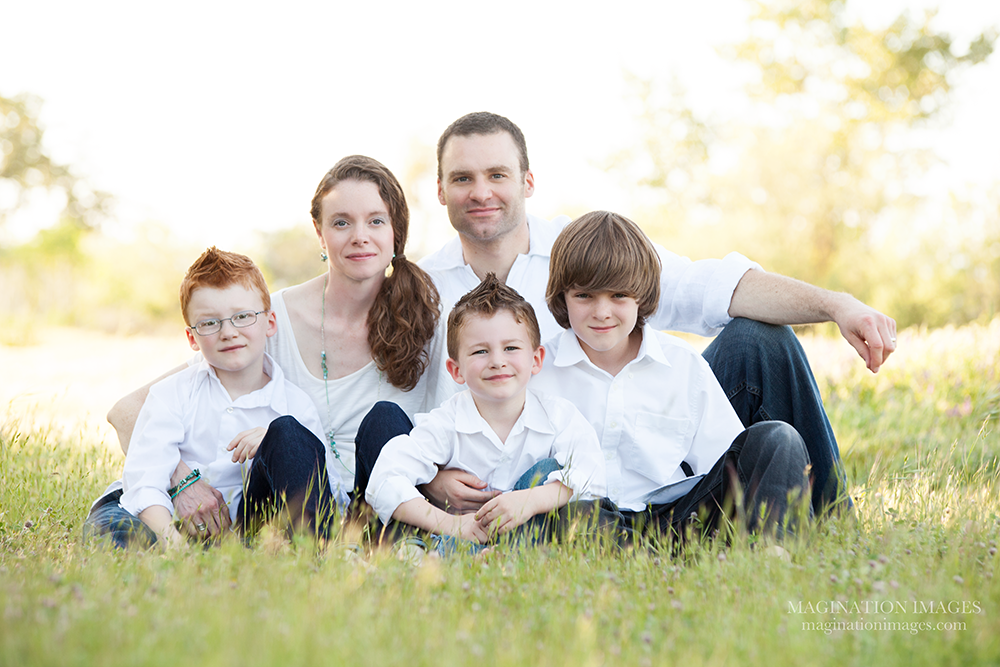
Carefully posed jean-clad legs works to break up the whiteness of the tops and Mom’s different style of blouse and her green necklace adds variety to the shot. This example really is an exception to the rule. So, IF you just HAVE to dress your family in the same color make sure that you are using different cuts, styles and accessories to make things interesting and define the individual.
2.) Complimentary Colors. Some folks are born with the amazing skill of color coordination. I was not and over the years have had to have a little help pulling complimentary colors together. Have you ever shopped the paint section of a hardware store? You know those fabulous paint chips with a variety of colors on them? Those can be a super handy tool for putting together group wardrobes. Typically Mom is going to choose her outfit first (We are Queen of the household and it’s our God-given right!) Once you have that dress or that blouse, take it with you to Home Depot and hit the paint section! Find the color on a variety of paint chips and choose your palette! Typically, I recommend choosing 2 colors then adding a light tone and a bright pop. Smaller groups can use less colors. Let’s look at some examples.
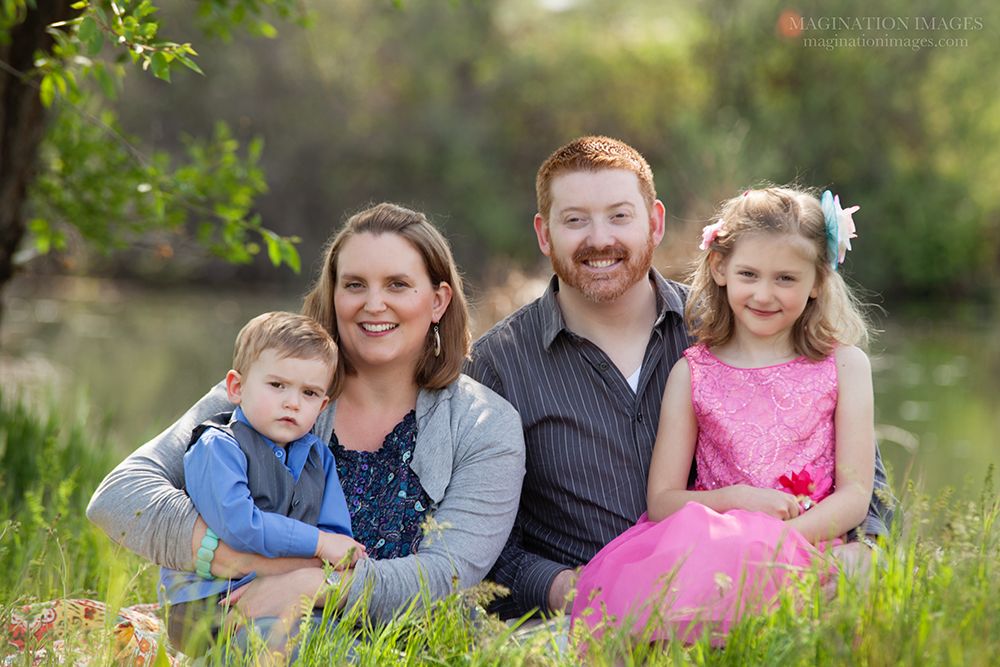
This adorable family is using dark grey and blue as their base colors. Dad and Son’s shirts are pulled together by the blue and dark of Mom’s shirt. Mom’s lighter grey sweater is the light tone and Daughter’s pink dress is the color pop. It all flows together nicely. Also, note the teal of Mom’s bracelet and Daughter’s hair bow – details, people; it’s all in the details.
3 copy
With these lovely ladies Grey and white are the base colors. The cream from Mom’s scarf is the light note and the pink of Daughter’s scarf is the color pop. Grey/white/pink/cream is just a beautiful pallet! I love how they flow together. Another element in this wardrobe which adds dimension and makes the shot more interesting is the combination of different textures. The soft tulle of the Daughters’ skirts, the rich texture of Mom’s crocheted scarf and the feathery elements of Daughters’ hair bows all work together to help create a rich image.

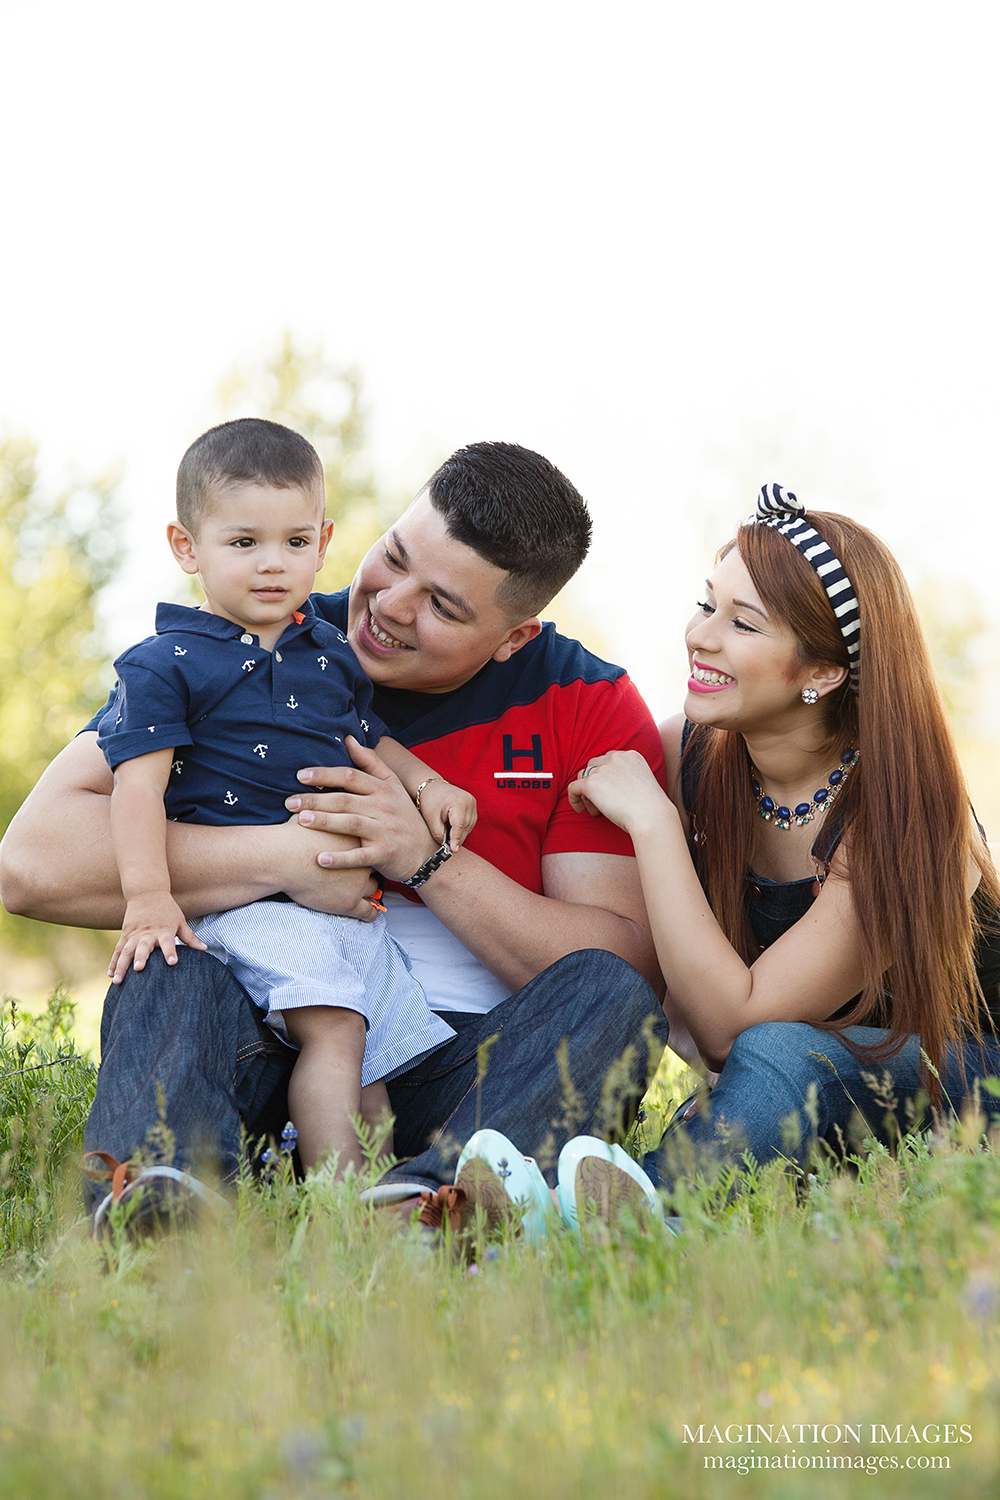
With this little family navy blue and white are the base colors complimented by the light blue of Son’s shorts. The color pop is coming in from the red on Dad’s shirt. The black and white striped headband on Mom helps make things interesting and draws the eyes to Mom’s face.
For this session the family is using teal blue and cream as their base colors, the light tone is white and the color pop is coming from the interesting pattern of Son’s plaid shirt.
3.) Finding your “centerpiece” – Your centerpiece is the most interesting item of clothing. It is traditionally the item that will display the color pop – whether it is an interesting pattern, a bright color, shiny beading – it is the element that will really stand out in your photos. Only one person in the group should wear a centerpiece item (that’s why it’s called the “centerpiece”) . On a single individual the centerpiece works to accent the ensemble of the group. Too many eye-catching pieces will make the image look too “busy” and take away from the focus on the subjects.
Now that you have an idea of what direction to take in putting together your group wardrobe go out and have fun with it!
- J & A: Engagement Session
- Bridal Resources – Maximizing Your Wedding Experience: Our Best Tips for Brides